

We’re currently celebrating our house’s thirteenth birthday (thirteen years with us) and its 128th birthday on this street. To watch and read about the whole process in those early years (pre-blog), check out our rehab slide shows, nine of them, here.
…..
We’ve covered all the rooms in the house, but none of those rooms really work until you have a way to access them. Enter the stair hall – the vertical connection we inserted into this house of three separate floors to make it work.
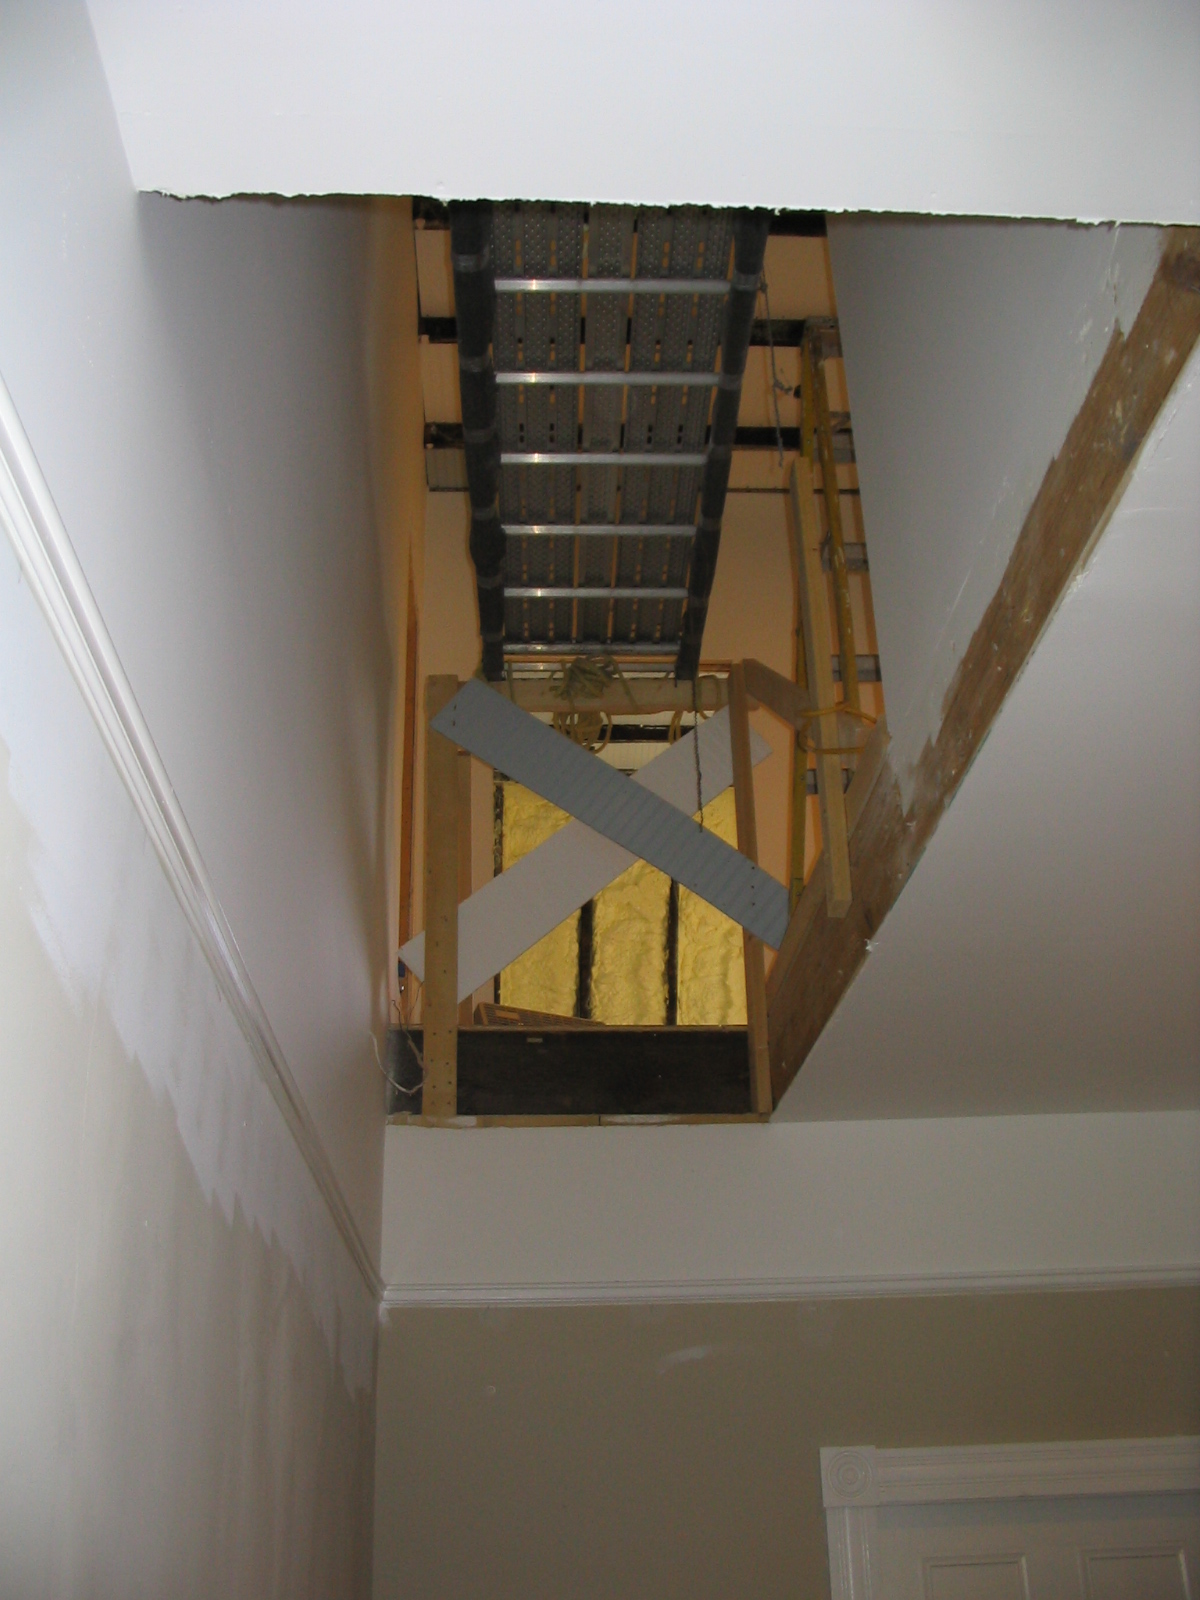
This was the lovely view in the attic where the future stair was planned. I know it’s dark, but you can see the pine wall beyond that we salvaged and used horizontally on E’s sloped wall.

When we did the first major work in 2000 on the house we framed all of the openings for the stairs. This involved inserting some pretty hefty beams into place, attaching the existing floor joists to the beam on one side, and removing the joists on the other side. Since we knew we weren’t going to be working in the attic for several years, we didn’t want a gaping hole left to that nastiness, so we just reinstalled those joists in place – you can see them there below.

Fast forward three + years, and you can see that we were working up there even before we had the stair in place. For the second time in our house-history we had a lovely ladder as our access (plus that tiny little attic stair from the porch, if you remember.)

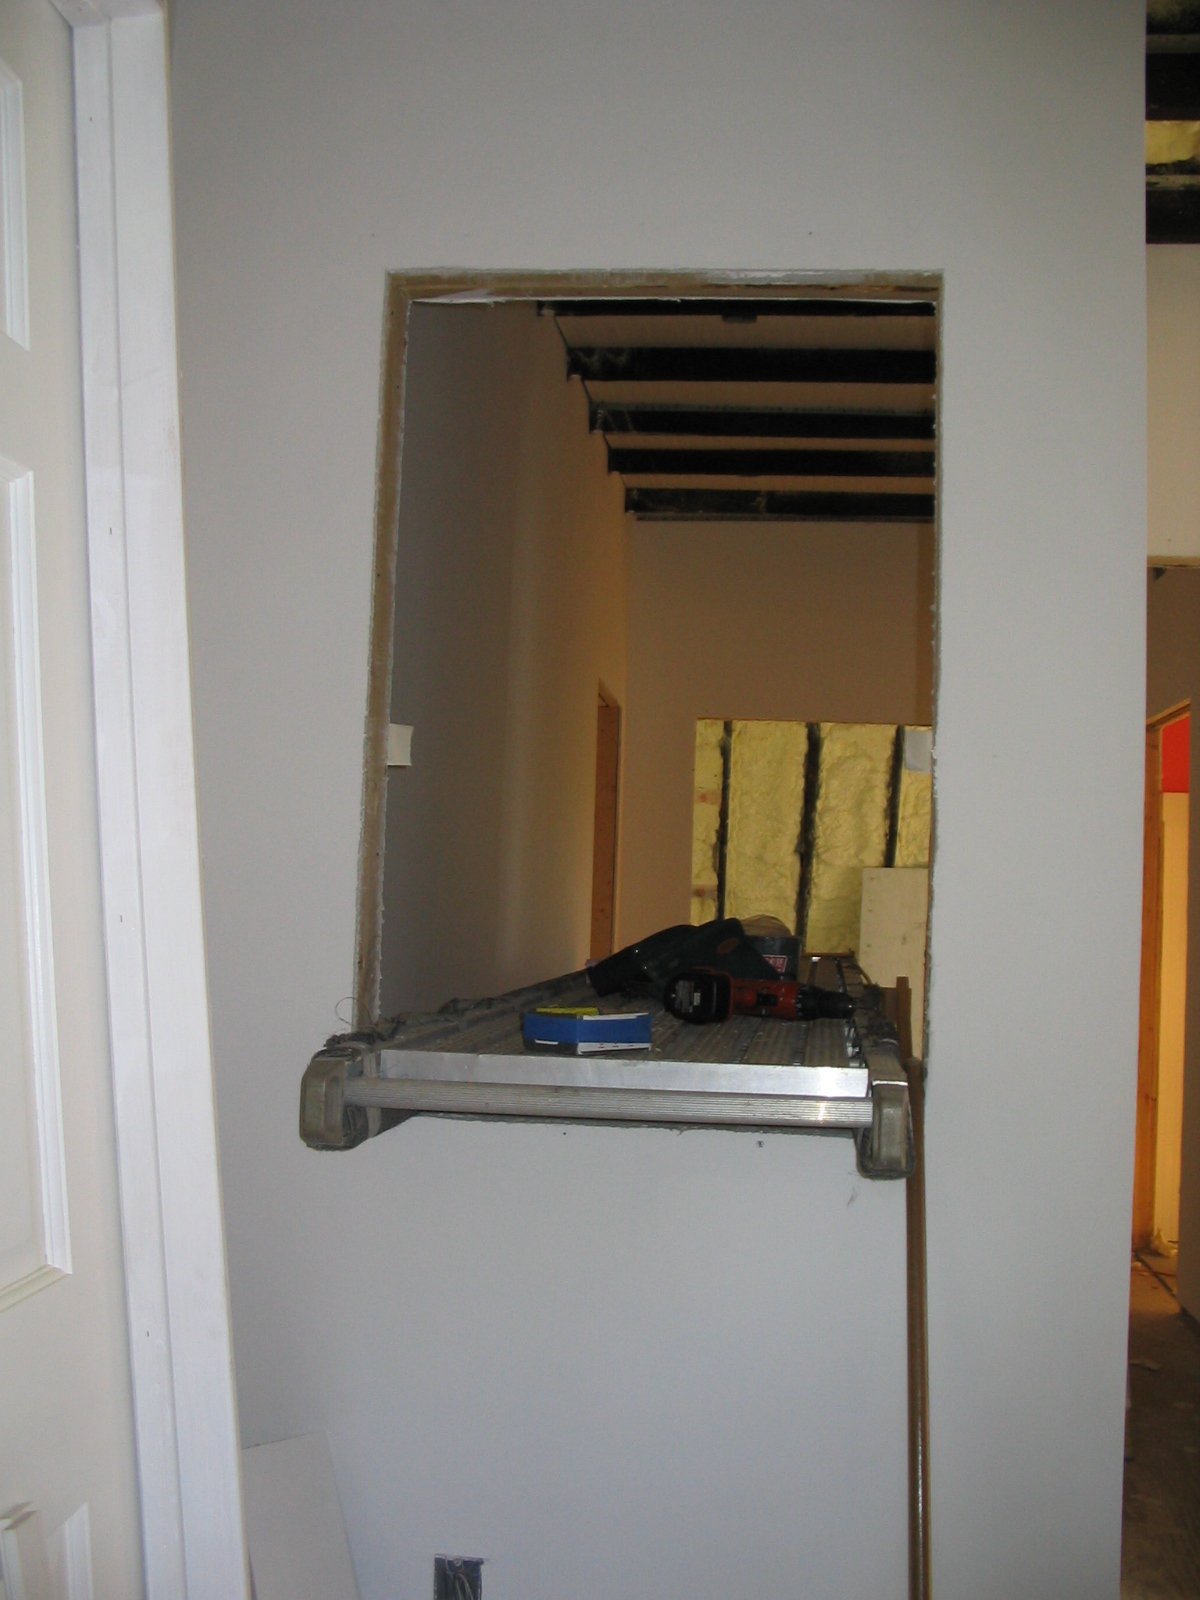
We rented some scaffolding planks for awhile and suspended one between the interior window in F’s room and some wood framing on the landing so that we could work on the ceiling above the stairs.

It was perfectly sturdy, but it might have still seemed a little creepy perched up there. I don’t believe I spent a lot of time on it.
We installed bead board between the existing ceiling joists – just like we did in both girls’ rooms. Here you can see the existing beams with the metal track attached, and the bead board installation complete.

Then the Fypon beam covers went up (a significant investment), and the trim work began at the edges – that’s the unpainted wood piece you see in the picture below. Imagine the work of installing crown molding in a room – all the miter cuts and fitting at the four corners. Then imagine doing this between every single roof joist on the third floor. That’s a lot of cutting and fitting – ten feet overhead. There are probably 30+ beams up there.

Back on the second floor we installed steel brackets at the base of the stair…

…then we attached the stringers at each end. Next came the endless bolting on those steel brackets, and we attached stair treads every three or so, to give a platform for installing more brackets.

Slowly working our way up the stair…

…until we made it to the top. Once the stairs were in place (hooray) we could start to move bigger items upstairs, like wardrobes and cubbies and sinks and tubs. Things were starting to really progress around here.

The west wall of our house is the wall with the original chimneys – so in the middle three rooms on each floor we had to furr out the wall to bypass the chimney bump-outs. This means the walls are pretty thick, and we were able to take advantage of that on the third floor landing. Since we were already having custom wardrobes made in both bedrooms and cubbies in the bathroom, we also had the cabinet maker fabricate a shallow niche for this space.
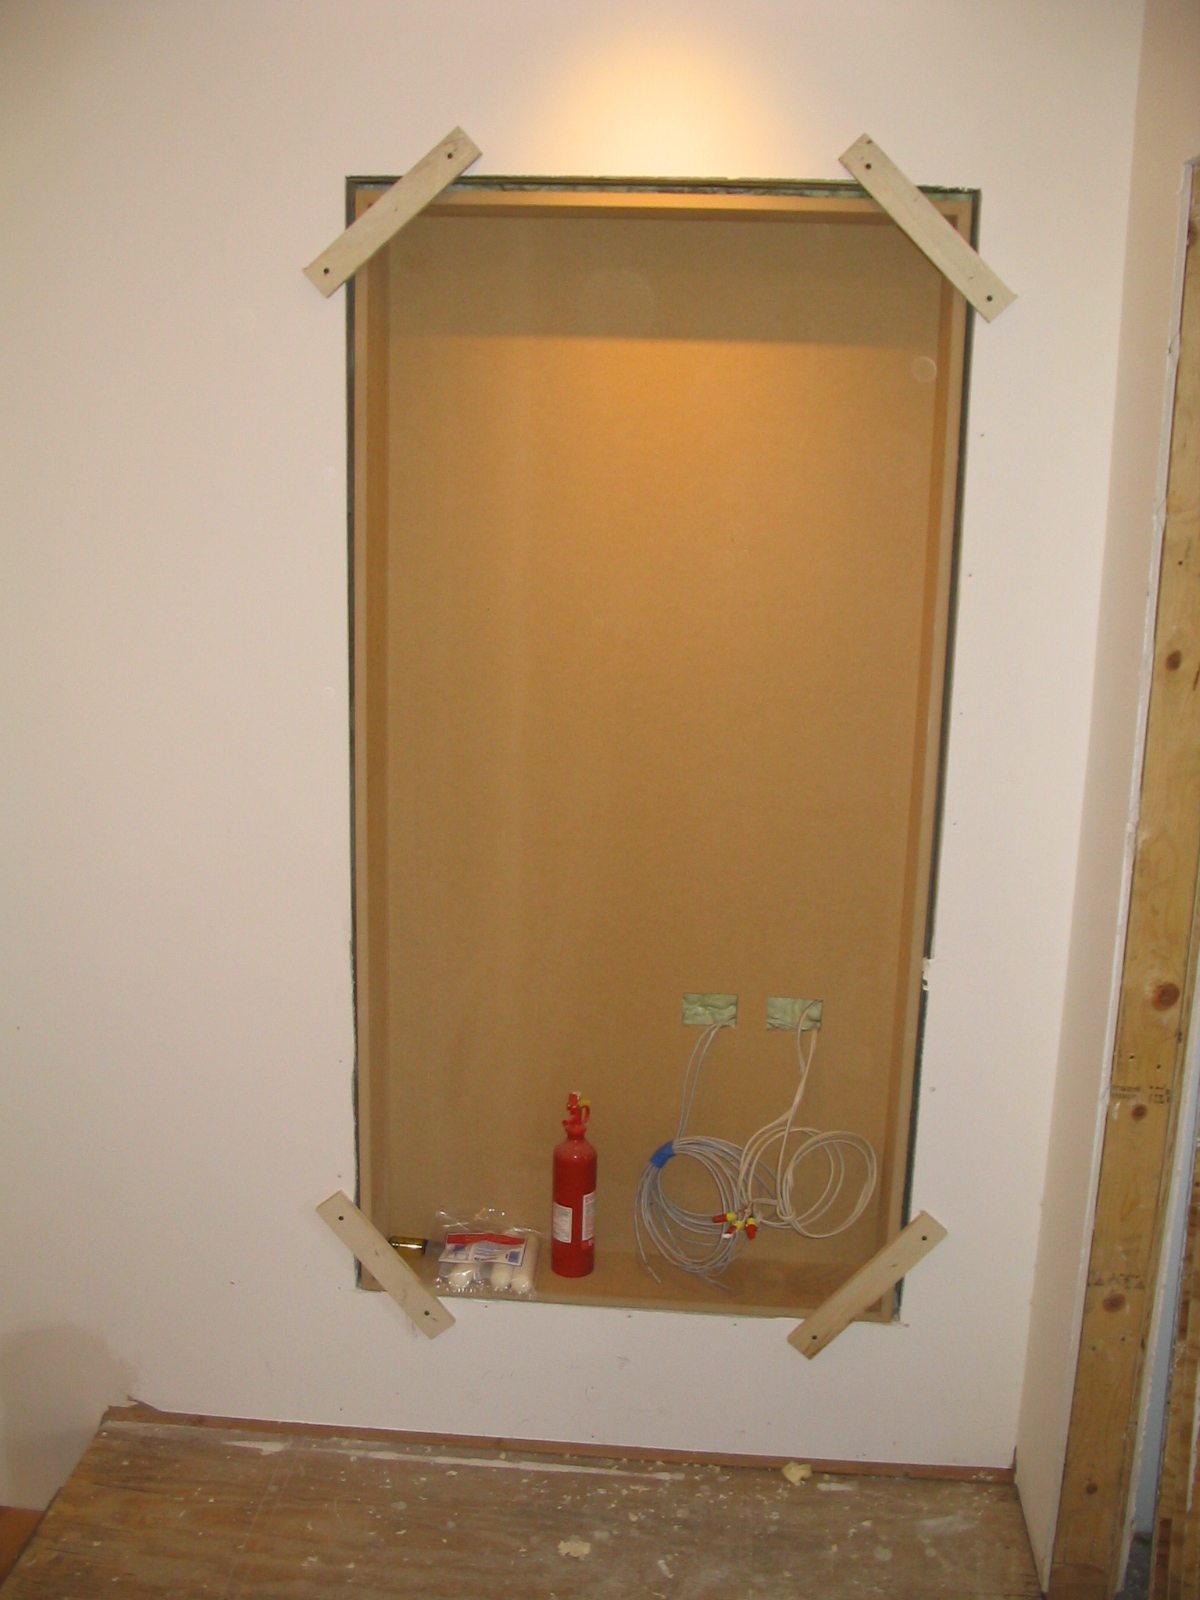
The shelves stayed in this condition (unfinished) for awhile as we settled into life with a newborn. Eventually we started work on the back bedroom, and began trimming out the stair hall at the same time.

We trimmed out the shelves, and painted everything white. E must have been four by this time because I can see four birthday hats on that lower shelf and my favorite drawing ever of our house. (She inserted an extra floor – on purpose – so that her grandparents could stay longer, in comfort.)

Soon after that we decided to paint the back of the shelves with chalkboard paint and I purchased some chalkboard markers to use on it.

Unfortunately – cool as they were – they were a bear to clean off when you wanted to change the look. I think the drywall was more porous than a chalkboard would be. And now, in my handy-dandy birthday hat timeline way, you can see we are up to age five, 2008. You can also see my “This is so cool!” very lightly if you look close enough.

Just after F was born we decided to do something fun on the opposite wall of the stair hall for E’s Christmas gift. First we painted the wall with magnetic paint – many, many coats –

and then we painted over the bottom part with chalkboard paint, and the top half with wall paint, up to the picture rail.

The straight lines seemed a little boring to me, so I just went a little nuts with the chalkboard paint at the far end and made a little cityscape. Sometimes it serves as a jumping off point for the magnets and the drawing, but the rest of the time it’s just a fun little corner that makes me smile.

That Christmas we made E a ton of custom magnets for the wall – scanning photos of her friends from their class picture, and bodies of famous people like race car drivers and soccer players, plus various forms of transportation, clothing, signs of local haunts and lots and lots of words (like those poetry magnets we all had on our graduate school refrigerators).
I had a collection of all her cards since she was born, and in a major effort to purge some of that collection, I cut out images from the cards and added magnetic tape. Kids that visit gravitate here, and sometimes they play for hours with the boxes and tins of magnets.


The shelves got another coat of chalkboard paint, but we never draw on it anymore – now it houses the constantly growing collection of artsy stuff in the house. It used to hold paperbacks so perfectly – but those have moved to the living room bookshelves and that shelf now holds the many duct tape rolls E owns. The years tick by and that upper shelf slowly fills with birthday hats – one for the first six years for each girl – so we’re up to nine, and will be adding another one in a couple of months.

Maybe it’s just a hall, but it’s a nice one. When you finally get to that top landing (after climbing thirty-five stairs to get there), you know you are in the kids’ domain. There’s usually a pile of laundry waiting to go downstairs, or some books to return to the library, or homework waiting for its morning trip downstairs to the waiting backpack. The upper railing isn’t done, so it’s just plywood and 2×4’s, and not such a lovely thing. Finishing any project is far more difficult than starting it. We’ve done this space in fits and spurts – every three years or so we give it another good go. We’re probably due some more work soon – some paint, a finished railing, a few more birthday hats.
Living in a vertical house isn’t for everyone, but it works for us. We progress downwards at the start of the day, and back up again at day’s end; downwards in anticipation of what the day might bring, upwards in contentment that whatever it brought, we’ve all ended up here, together.
I love the floating stairwell. We are thinking of eventually replacing ours. Curious if you did the install work yourselves~
Where did you get the stringer steel brackets from?
We designed them and had a local fabricator make them.
Those are really nice. Thank you.
I came here from Making It Lovely and I am so happy to have found this and I *absolutely* love the idea of making birthday hats (and keeping them) and using the cards/pictures/cut outs for the magnetic board. Those are both such fun ideas! And what a very lovely home you have!
Thanks – that’s really sweet of you! Welcome.
Do you still have the design for the brackets? They are exactly what we’ve been looking for. There is a steel fabricator here in Anchorage that can make them.
It is just so WOW! from scratch to riches idea and design.